Sinus Floor Elevation Using the SLA Kit with 2 mm of Residual Bone Height and ALX-BT Implant Placement


Case Summary 🔎
Patient Information
Age / Sex: 74-year-old female
Medical History: Currently taking antihypertensive medication.
Clinical Diagnosis: #16,17 Missing tooth.
Clinical Summary
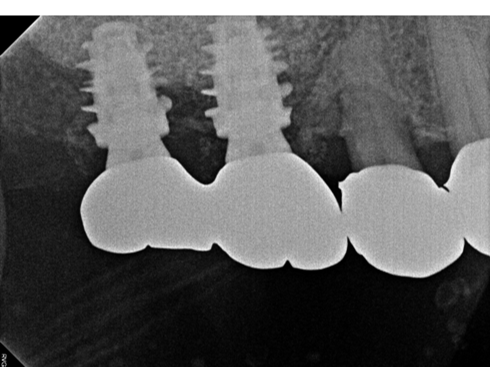
The patient presented with insufficient bone volume in the maxillary posterior region due to limited residual bone beneath the maxillary sinus. Sinus floor elevation and bone grafting were performed using a SLA Kit for Ø5.5 LS-Reamer and an sinus membrane elevation, followed by placement of an ALX-BT implant. After approximately 5 months of healing, the cover screw was replaced with an Encoded Scanbody for intraoral scanning, and the SCRP prosthesis was tried in to verify interproximal contacts and occlusion.
1️⃣Pre-op


2️⃣Surgical phase - Using Sinus Graft Lateral Approach (SLA) Kit


A vertical incision was made in the mucosa near the apex of #16.
The Ø5.5 LS-Reamer, designed for sinus surgery, was placed against the lateral sinus wall to create access while minimizing the risk of sinus membrane perforation.
Its tip provided stable positioning throughout the drilling procedure.

The lateral sinus window was prepared using the LS-Reamer, allowing direct visualization of the sinus membrane without a residual bone disk.
The membrane was carefully elevated with an SLA kit elevator, and the resulting space was augmented with a combination of autogenous and allogeneic bone grafts.

Drilling up to Ø4.0 mm and placement of three ALX-BT implants in the maxillary anterior region.
#16,17 ALX-BT Ø6.0x8, D300, 20Ncm
Despite D300 bone quality and a residual bone height of only 2 mm, an insertion torque of 20 Ncm was achieved, demonstrating favorable primary stability under challenging anatomical conditions.


Adequate soft tissue healing around the cover screw and stable graft maintenance were observed.
3️⃣Prosthetic phase


Intraoral scanning was performed.

SCRP implant prosthesis was tried in to assess proximal contact and occlusion.
The resin wire splint on the opposing teeth was removed after confirming proper prosthesis fit.
*SCRP Technique: Place gauze in the screw access hole to prevent cement intrusion, and remove it before the cement fully sets to facilitate excess cement removal.Then seal the access hole with Teflon tape and resin.


Comments