Single Anterior Implant with Natural Teeth Restorations
- Dr. Hyunggu Im

- Jul 18, 2018
- 3 min read
Introduction
Composite Seal Technique” Placing flowable composite resin over a wide healing abutment on immediately placed implant at a fresh extraction socket


Immediate Provisional VS Custom Healing Abutment VS Wide Healing Abutment Restoration + Flowable composite
(Composite Cap Technique)
Patient Information
28 year old female
Non - smoker
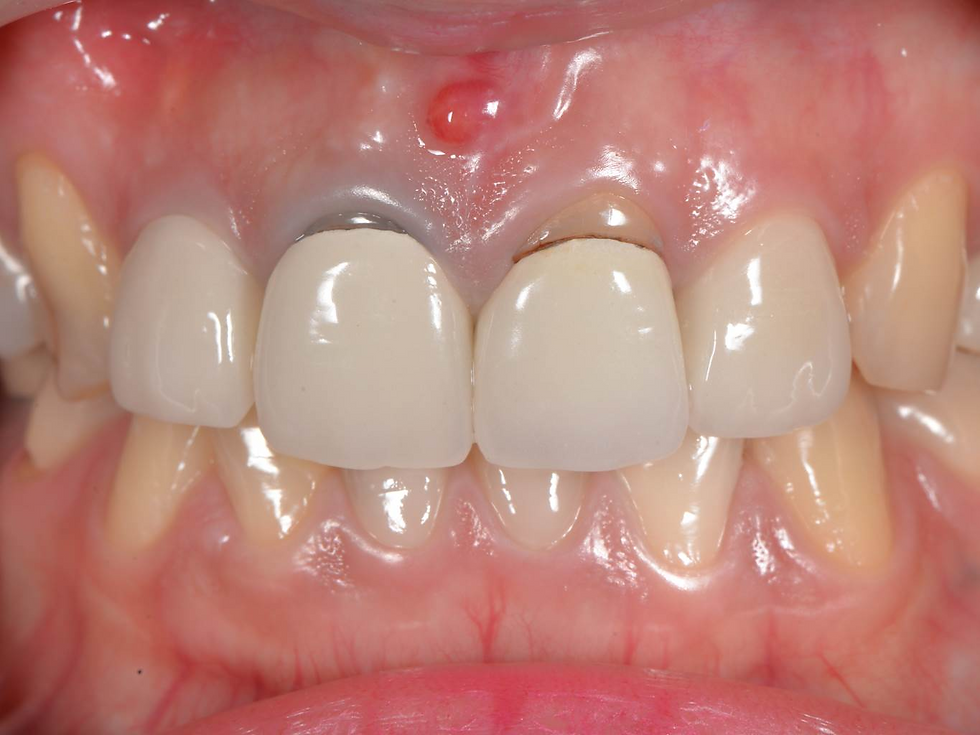
Chief Complaint : “I have some swelling on my front tooth”


Pre-operative Radiograph

Peri-radicular pathosis on #11,12,21

Pre-op CT scan of #21 shows a cast post & core and peri-radicular radiolucency that seems to penetrate the buccal bone at the apex area.
Abstract
The aim of this clinical report is to introduce a technique to manage the extraction socket after immediate implant placement.
After an implant is in place, a wide healing abutment is engaged to cover the extraction socket. The remaining gap between healing abutment and the free gingival margin is then sealed with flowable composite resin that is applied directly around the healing abutment.
This technique eliminates suturing procedure and stitch out appointment, which significantly reduces the operating time. Also, since there is neither trauma or tension on the soft tissue from suturing, minimal patient discomfort and fast healing can be achieved.
Diagnosis
Peri-radicular periodontitis on teeth #11, 12, 21
Incomplete endodontic treatment on tooth #11
Defective composite restoration on #13
Treatment Plan
Re-endo treatment for teeth #11, 12, 21
In case #21 is not restorable or considered to have a questionable prognosis, it will be removed and replaced by an implant.
Composite restoration for #13

Crowns were removed and re-endo Tx was done for #11, 12, 21. However, the lesion was not resolved. So patient was recommended to remove #21 and place an implant immediately after extraction.
Post-Retreat 2 weeks
SOCKET-SHIELD TECHNIQUE

“Socket-shield technique” was used for #21 in an attempt to preserve maximum amount of the buccal bone. Obviously, the granulation tissue was throughly removed along with apical portion of the root.

An implant was placed slightly towards the palatal side to make sure the screw access hole comes out at the cingulum area. Also, notice the gap between the implant and the remaining root.

Bovine bone collagen was grafted in the socket
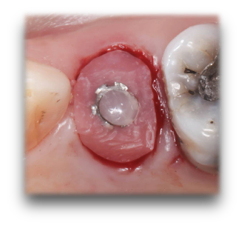
COMPOSITE CAP TECHNIQUE

Healing abutment was engaged and the remaining gap was filled directly with flowable composite resin without suture.
PMMA PROVISIONAL RESTORATIONS
3-unit #11, 12 supported cantilever FPD was fabricated with CAD/CAM PMMA.

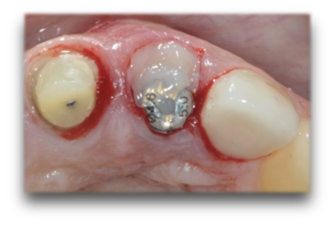
Post-op 10 weeks

Soft tissue has covered the remaining root. Notice the well preserved contour of the soft tissue on the buccal aspect of #21.
IMPLANT SUPPORTED PROVISIONAL CROWN

3 months after the operation, the 3-unit provisional FPD was converted to a 2 unit splinted crowns and a implant supported single crown.

Implant supported provisional crown was adjusted to create a harmonious emergence profile as the contra-lateral natural tooth.

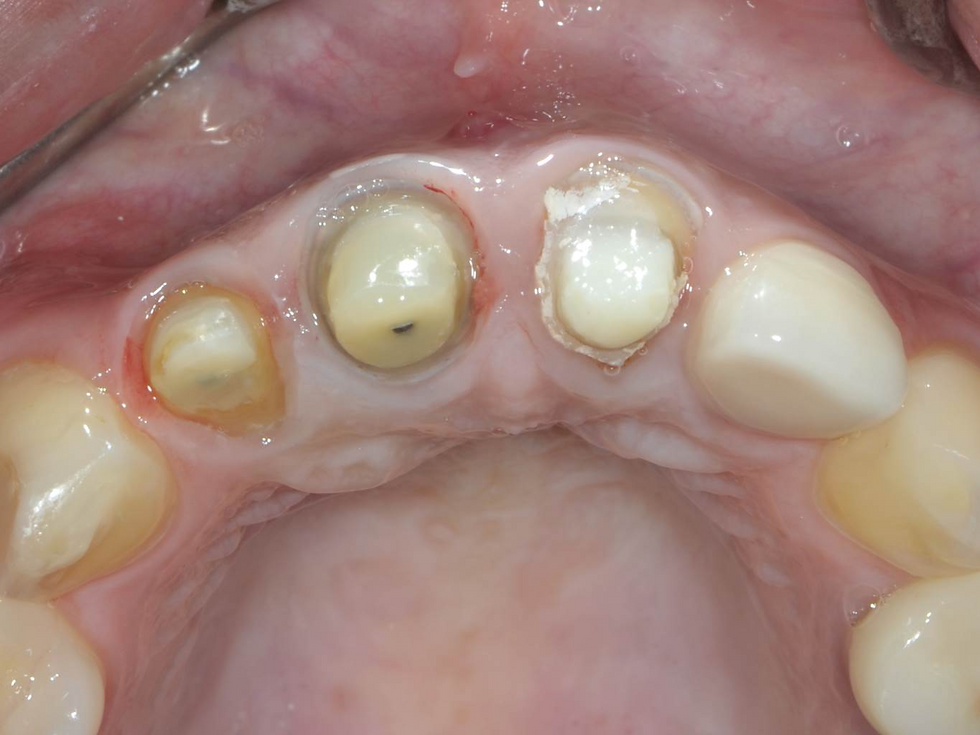
Definitive impression was made. Notice the well preserved architecture of the soft tissue.

Pick-cap impression coping was used and flowable composite resin was injected into the socket immediately to preserve the emergence profile.
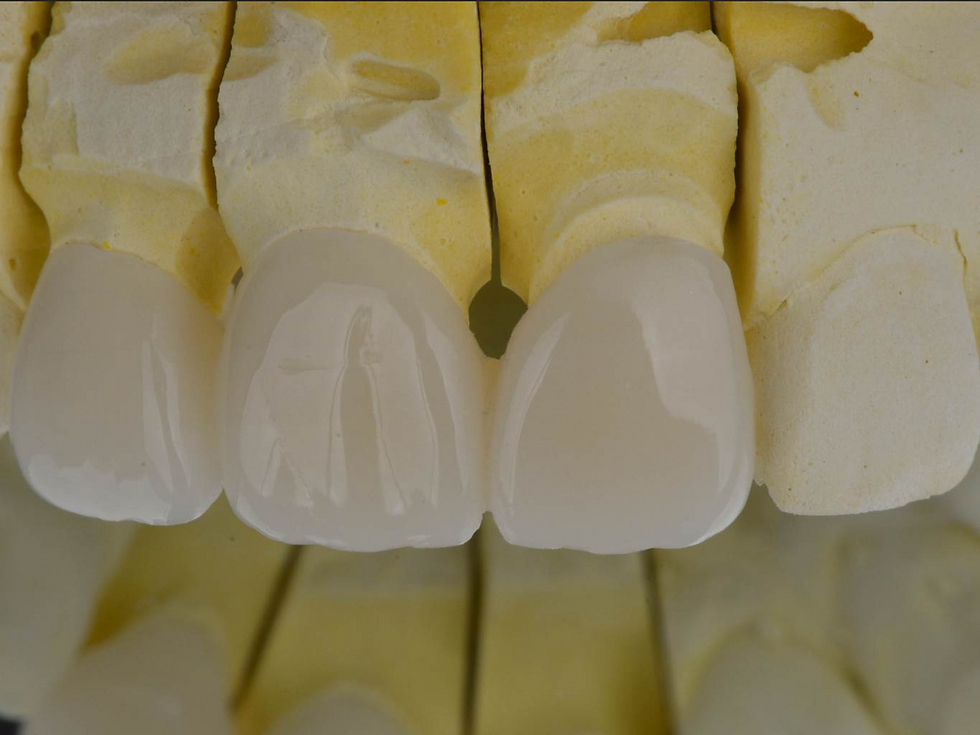
PFZ single crowns for #11, 12 and a screw-retained implant supported PFZ crown for #21 were delivered.

Final Radiograph
Before treatment

After treatment
Conclusion “Composite Cap Technique” can be successfully applied to a maxillary anterior implant case where the esthetics is a major concern. It allows to execute minimally invasive immediate implant placement with the least patient discomfort and fast healing. More importantly, this technique will provide predictable soft tissue healing and preservation of the emergence profile.


Comments